コンポーネント取得
GetComponent関数
GameObjectに格納しているコンポーネントはスクリプトで取得して 変更を加えることが可能です。 コンポーネントの取得には「GetComponent関数」を使用します。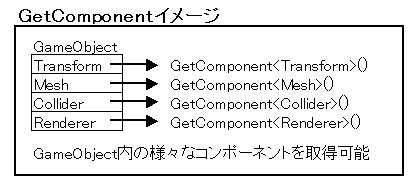

メソッド仕様
メソッド名: GetComponent 戻り値: 成功: 指定したコンポーネント 失敗: NULL 引数: なし 型指定: GetComponentで取得したいデータ型 内容: GetComponentで指定したデータ型を取得する 書式例: GetComponent<データ型>() 具体例: // MeshRendererコンポーネントの取得 MeshRenderer mesh = GetComponent<MeshRenderer>();使用例
①.Cubeを作成 Hierarchyに「Cube」を作成する ②.スクリプト作成 C#スクリプトを追加し、「MatChange」と名前をつける ③.関連付けする ②で作成したスクリプトを①で作成したオブジェクトに関連付けする ④.処理実装 以下のソースをUpdate関数内に追加する // ゲームオブジェクトに格納されているMeshRendererを取得 MeshRenderer mesh = GetComponent<MeshRenderer>(); // MeshRendererのメンバであるマテリアルの色を変更 if (Input.GetKeyDown (KeyCode.Z) == true) { mesh.materials[0].color = Color.blue; } else if (Input.GetKeyDown (KeyCode.X) == true) { mesh.materials[0].color = Color.red; } ⑤.実行 実行したらZを押したらCubeが青色にXを押したら青色に変更されます。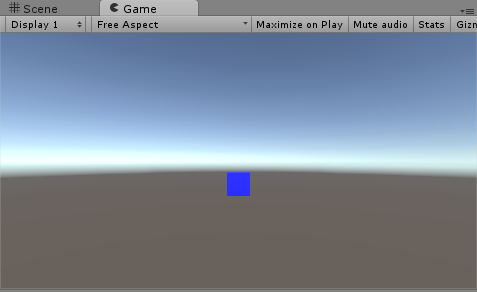

スクリプト取得
スクリプトもコンポーネントの1つなので、GetComponentで取得可能です。 スクリプトで定義しているクラスを取得可能なデータ型として取得することができます。使用例
①.Timer作成 Hierarchy => UI => Textを選択し、「Timer」と名前をつける ②.Timerスクリプトを作成 C#スクリプトを追加し、「Timer」と名前をつける ※座標は全て0にする ③.処理実装 Timerスクリプトに以下のコードを実装する using UnityEngine; using System.Collections; using System; using UnityEngine.UI; public class Timer : MonoBehaviour { public float m_Time; // タイマー private Text m_Text; // テキスト // Use this for initialization void Start () { // Textクラスをコンポーネントとして取得 m_Text = GetComponent<Text>(); } // Update is called once per frame void Update () { // 時間減少 m_Time -= Time.deltaTime; // テキスト内容変更 m_Text.text = "Time:" + Math.Round(m_Time, 2); } // 終了チェック public bool IsEnd() { return m_Time <= 0.0f ? true : false; } } ④.スクリプトの関連付け ②で作成したスクリプトを①で作成したオブジェクトに関連付けする ⑤.時間設定 InspectorのTimer(script)にTime項目が追加されているので5と設定する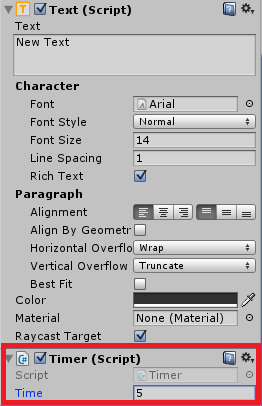
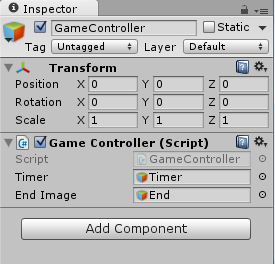
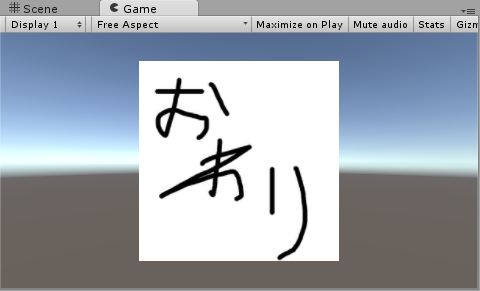
⑥.終了画面用オブジェクト作成 Hierarchy => UI => Imageを選択し、「End」と名前をつける ⑦.画像追加 以下のリンクから画像をダウンロードし、Unityに追加する 終わり画像 ⑧.Imageに設定する ⑥で作成したオブジェクトに⑦で追加した画像を設定し、 PosX => 0、 PosY => 0、PosZ => 0、 Width => 200、Height => 200に設定する ⑨.GameController作成 HierarchyからCreateEmptyを選択し、「GameController」と名前をつける ⑩.GameControllerスクリプトを作成 C#スクリプトを追加し、「GameController」と名前をつける ⑪.処理実装 GameControllerスクリプトに以下のコードを実装する public class GameController : MonoBehaviour { public GameObject m_Timer; public GameObject m_EndImage; // Use this for initialization void Start () { m_EndImage.SetActive (false); } // Update is called once per frame void Update () { if (m_Timer.GetComponent<Timer>().IsEnd () == true && m_EndImage.activeSelf == false) { m_EndImage.SetActive (true); } } } ⑫.スクリプトの関連づけ ⑨で作成したオブジェクトに⑩で作成したスクリプトを関連付けする ⑬.オブジェクト設定 ⑨のオブジェクトの項目にTimerとEndImageが追加されているので Timerには①で作成したオブジェクトをEndImageには ⑥で作成したオブジェクトを関連付けする
⑭.実行 実行するとテキストの数値が段々減っていき、0になると画像が描画されます。
上記のようにゲームオブジェクトから別のゲームオブジェクトを扱う場合に GetComponentが使用されます。
補足
SetActiveメソッド仕様
メソッド名: SetActive 戻り値: なし 引数: bool フラグ: true: 動作再開 false: 動作停止 内容: オブジェクトの動作の再開、停止設定を行う 停止中はUpdateや描画が行われないactiveSelfメソッド仕様
メソッド名: activeSelf 戻り値: アクティブ状態 true: 動作中 false: 停止中 引数: なし 内容: オブジェクトのアクティブ状態を返すゲッター
子供のコンポーネント取得
コンポーネントは子供のコンポーネントの取得も可能です。 取得関数はGetComponentInChildren、またはGetComponentsInChildrenを使用します。GetComponentInChildrenメソッド仕様
メソッド名: GetComponentInChildren 戻り値: 成功: 取得したコンポーネント 失敗: null 引数: なし 型指定: 取得したいコンポーネントのデータ型 内容: 引数で指定したコンポーネントを自分も含めて検索して取得する この検索結果は最初にヒットしたコンポーネントを返す ※「自分も」と記述している通り、関数を呼び出しているGameObjectも 含めて検索を行うのでその点については注意が必要 書式例: GetComponentInChildren<データ型>() 具体例: MeshRenderer mesh = GetComponentInChildren<MeshRenderer>();GetComponentsInChildren関数仕様
関数名: GetComponentsInChildren 戻り値: 成功: 取得したコンポーネントの配列 失敗: null 型指定: 取得したいコンポーネントのデータ型 内容: 引数で指定したコンポーネントを自分、子供、孫を含め検索して取得する 検索でヒットしたコンポーネントは配列に格納されて全て返される 書式: GetComponentsInChildren<データ型>() 具体例: MeshRenderer[] mesh_array = GetComponentsInChildren<MeshRenderer>();使用例
①.親オブジェクトの作成 HierarchyからCreateEmptyを選択し、名前を「Parent」とつける ②.Cube作成 HierarchyにCubeを作成し、座標を「0, 0, 0」とする ③.Sphere作成 HierarchyにSphereを作成し、座標を「0, -1, 0」とする ④.親子関係の作成 ①で作成したオブジェクトに②と③のオブジェクトをD&Dして 親子関係を作成する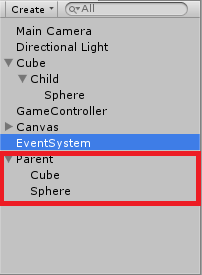
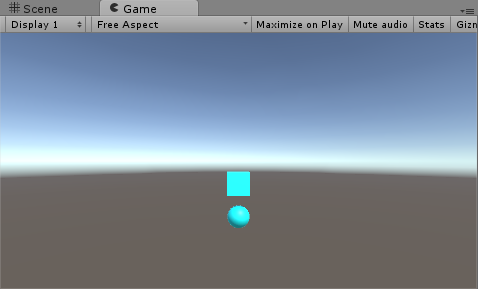
⑤.MatsChangeスクリプトを作成 C#スクリプトを追加し、「MatsChange」と名前をつける ⑥.処理実装: MatsChangeスクリプトに以下のコードを実装する public class MatsChange : MonoBehaviour { // Use this for initialization void Start () { // MeshRendererをまとめて取得 MeshRenderer[] mesh_array = GetComponentsInChildren<MeshRenderer> (); foreach (MeshRenderer mesh in mesh_array) { if (mesh != null) { mesh.materials [0].color = Color.cyan; } } } // Update is called once per frame void Update () { } } ⑦.スクリプトの関連付け ⑤で作成したスクリプトを①で作成した「Parent」に関連付ける ⑧.実行 処理を実行してCubeとSphereの色がシアン色になったら成功
